How to Make a Wood Pipe: A Step-by-Step Guide

Making a wood pipe at home might seem tricky. You may worry about getting it right or where to start. But, with the right guide, creating your own wooden pipe can be straightforward and enjoyable.
A key fact: many successful pipe makers began their journey with just a few simple tools and techniques.
Our step-by-step guide will walk you through choosing the best wood, shaping your pipe, and finishing it beautifully. We'll make sure you have all the info you need to craft a durable and stylish smoking accessory.
Get ready to create something amazing!
Key Takeaways
- Start with selecting a durable wood like briar for crafting your pipe, known for its heat resistance and strength.
- Use essential woodworking tools such as saws, drill bits, chisels, and sandpaper to shape, carve, and smooth the pipe.
- Drill carefully to create the bowl of the pipe without splintering the wood; this step is vital for both aesthetics and functionality.
- Glue the two halves of your wood pipe securely after shaping them accurately to ensure they fit perfectly together.
- Finish by sanding your pipe smoothly and applying a protective coat to enhance durability and appearance.
Materials and Tools
Select a sturdy wood for durability and consider using basic woodworking tools such as chisels, gouges, and mallets. Sandpaper will be essential to achieve a smooth finish on the pipe.
Wood selection
Picking the right wood is crucial for making a top-notch wooden pipe. You'll want to start with a briar block, known for its durability and heat resistance - perfect for weed smokers looking to craft their own smoking accessory.
Briar stands out in the woodworking world because of its unique qualities that make it ideal for pipes.
Working with hand tools adds a personal touch to carving your pipe from this preferred material. The process requires precision and perseverance, but creating your own wooden cannabis pipe means you get exactly what you envision.
Whether using a knife or a complete pipe carving kit, selecting briar as your base sets the foundation for an exceptional handmade piece.
Woodworking tools
To begin making a wood pipe, essential woodworking tools are required. These include a saw for cutting the wood, along with drill bits to create the bowl and stem holes. A drill is necessary for shaping the interior of the bowl while sandpaper helps in finishing and smoothing out rough edges.
Additionally, a dust mask should be used when working with wood to protect against inhaling debris.
Crafting your own wooden tobacco pipe involves using basic hand tools such as chisels, gouges, rasps, and files for shaping the stummel and stem. In addition to these essential tools, having a vice or clamps can help hold the workpiece securely while it is being shaped or drilled.
Sandpaper
Sandpaper is an essential tool for smoothing and refining the wood surface of your handmade wooden pipe. It helps to achieve a sleek and polished finish, enhancing the overall appearance of your creation.
By using different grits of sandpaper, starting with coarse and progressing to finer grades, you can effectively remove any rough edges or imperfections while shaping and refining the wood.
Additionally, sanding with progressively finer grits will ensure that the wood grain is smooth and uniform, providing a perfect canvas for applying any desired finishes or stains before assembling your custom-crafted pipe.
Steps to Make a Wooden Pipe
Crafting a wooden pipe involves cutting the pipe to size, drilling the bowl and shaping the stem before gluing both halves together and sanding them for a smooth finish. Once complete, your handmade pipe will be ready for use or display.
Cutting the pipe
Cutting the wood pipe is a crucial first step in the process. Using a saw, you should carefully cut the selected piece of wood into two equal halves to form the stummel and stem. Precision in this stage ensures that your pipe will have a strong foundation for carving and finishing.
These initial cuts will set the stage for creating a unique and artisanal smoking accessory that showcases your craftsmanship.
Next, we'll delve into drilling the bowl to create space for tobacco or cannabis, so let's move on from here!
Drilling the bowl
To drill the bowl, carefully mark the center of one end of the pipe blank. Hold the wood securely and start drilling with a 5/8-inch Forstner bit to create an indentation in which you will eventually carve your bowl.
Then, using a 3/4-inch Forstner bit, continue drilling until you reach about halfway through the wood. Take care not to splinter or crack the wood during this process. Finally, flip the blank over and repeat these steps on the other side to create a symmetrical bowl.
When drilling, it is crucial to maintain precision and patience as this step sets the foundation for your pipe's functionality. Measure twice before drilling and proceed with caution to ensure that your wooden cannabis pipe takes shape accurately and works efficiently when it comes time to enjoy its use.
Shaping the stem
After drilling the bowl, the next step in making a wood pipe involves shaping the stem. This part of the process requires careful attention and precision to ensure that the stem fits comfortably in your mouth.
Using sandpaper and woodworking tools, you'll carefully shape and smooth the stem to create a finished product that's both functional and visually appealing. The right shape ensures a comfortable smoking experience, making it an important aspect of crafting your own wooden pipe.
Gluing the two halves together
After shaping the stem and drilling the bowl, it's time to glue the two halves together. Apply a small amount of wood glue on the inside edges of each half, then press them firmly together.
Make sure that both halves are aligned properly before clamping them together securely. Allow the glue to dry completely before proceeding with sanding and finishing.
It's crucial to use a high-quality wood glue for this step to ensure a strong bond between the two halves. Once glued, be patient and let the bond set fully before moving on to ensure a sturdy pipe that will withstand regular use.
Sanding and finishing
First, use sandpaper to smooth out the exterior of the wood pipe. Then, apply a finishing product to seal and protect the wood. The final step is buffing the pipe to achieve a polished shine.
Keep in mind that proper sanding and finishing are essential for creating a durable and visually appealing wooden pipe.
Sanding smoothes rough edges and imperfections in the wood while finishing protects it from damage. By thoroughly implementing these steps, you can create a high-quality handmade smoking accessory that will stand the test of time.
Tips for a Strong and Resilient Pipe
Select a sturdy wood to ensure the longevity of your pipe, and remember to provide proper maintenance and care for optimal resilience. Embark on crafting your wooden pipe with these tips in mind.
Choosing a sturdy wood
When choosing a sturdy wood for your handmade pipe, consider hardwoods like cherry, oak, or briar. These woods are durable and resistant to heat, making them ideal for crafting pipes that will withstand regular use.
Also, ensure the wood is dry to prevent cracking and warping as it ages. By selecting a strong and resilient wood for your homemade pipe, you can create a long-lasting smoking accessory that enhances your DIY craftsmanship experience.
Proper maintenance and care
To keep your wooden pipe in prime condition, regularly clean it by running a pipe cleaner through the stem and bowl. Use a gentle twisting motion to remove any excess residue. Store your pipe in a cool, dry place to prevent warping or cracking.
Avoid exposing it to extreme temperatures or prolonged sunlight, as this can degrade the wood over time. Additionally, apply a thin coat of mineral oil to the exterior of the pipe periodically to maintain its luster and protect it from drying out.
Regular cleaning and proper storage are crucial for preserving the integrity of your handmade wood pipe. By following these maintenance tips, you can ensure that your creation remains durable and retains its quality for years to come.
Conclusion
Crafting a wood pipe involves precise steps such as selecting the wood, crafting the components, and meticulously carving the stummel and stem. This DIY project requires basic materials like a briar block, hand tools, drill, saw, drill bits, and sandpaper.
Delve into this creative craftsmanship using simple woodworking techniques to create your own bespoke smoking accessory. Remember to adhere to proper maintenance for a strong and resilient wooden pipe that enhances your smoking experience.
FAQs
1. What do I need to start making a wood pipe?
You will need woodworking materials like a piece of wood, carving tools, and sandpaper. These are essential for creative craftsmanship in DIY projects.
2. Can beginners try making handmade pipes?
Yes! Beginners can make handmade pipes by following step-by-step guides that teach basic woodworking techniques suitable for DIY projects.
3. How long does it take to make a smoking accessory like a wood pipe?
The time it takes varies based on your skill level and the complexity of the design. With practice, you can complete simpler designs in just a few hours using basic woodworking tips.
4. Are there any special tips for finishing my wood pipe project?
For an impressive finish, use fine-grit sandpaper to smooth the surface and apply natural oils or waxes to protect the wood. This technique enhances your pipe-making project's durability and aesthetic appeal.


![Pipe by Vessel [Gunmetal] - Headshop.com](http://www.headshop.com/cdn/shop/files/Pipe_Gunmetal_Angle.jpg?v=1744306453&width=900)
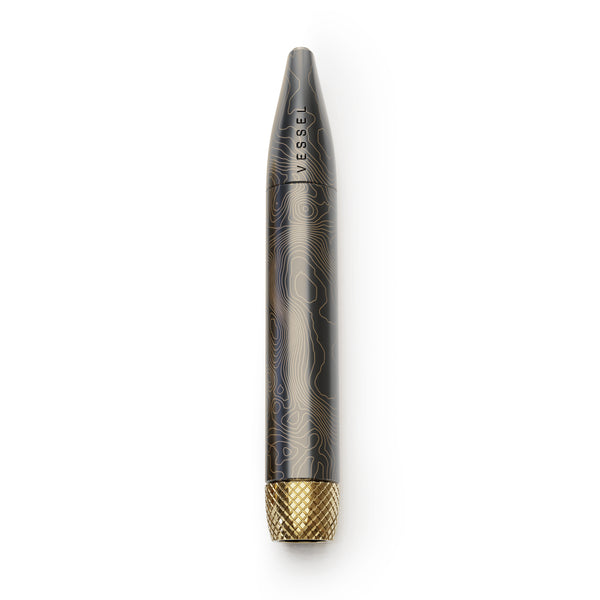
![Pipe by Vessel [Gunmetal] - Headshop.com](http://www.headshop.com/cdn/shop/files/Pipe_Gunmetal_Closed.jpg?v=1744306456&width=1000)


![Pipe by Vessel [Rose Gold] Pipe by Vessel [Rose Gold]](http://www.headshop.com/cdn/shop/files/Pipe_Rose_Gold_Closed.jpg?v=1744306576&width=600)
![Vessel - Cone [Onyx] Vessel - Cone [Onyx]](http://www.headshop.com/cdn/shop/products/6f51074a-2173-4ab4-876d-22a84764eb5d.png?v=1679517316&width=600)
![Vessel - Mill [Beechwood] Vessel - Mill [Beechwood]](http://www.headshop.com/cdn/shop/files/MILL_GUNMETAL_BEECH_COLLAPSED_FRONT_800.jpg?v=1744308513&width=600)
![Vessel - Air [Jade] Vessel - Air [Jade]](http://www.headshop.com/cdn/shop/products/7cd436a1-b1f0-4e01-9e52-050ad7140b56.png?v=1679506090&width=600)


