How to Make a Bubbler Pipe: DIY Guide for Crafting Your Own Water Pipe

Creating your very own water pipe might seem like a challenging task, but with the right guidance and materials, it's entirely achievable. A DIY bubbler pipe offers not only a personalized smoking experience but also proves to be cost-efficient and eco-friendly.
This article is designed to walk you through the process of crafting a homemade smoking device that combines functionality with personal flair.
With years of experience in DIY crafts and a particular interest in homemade smoking devices, I've learned that innovation is key to creating something truly unique and effective. Drawing from my adventures in making various types of DIY smoking apparatuses, including water pipes and bubblers, this guide is packed with actionable advice.
Get ready to craft your masterpiece!
What is a Bubbler Pipe?
A bubbler pipe is a type of water pipe used for smoking, providing a smooth and filtered experience compared to traditional smoking devices. Crafting your own homemade bubbler allows for personalization and cost efficiency in creating a unique smoking accessory.
Understanding the anatomy of a bubbler
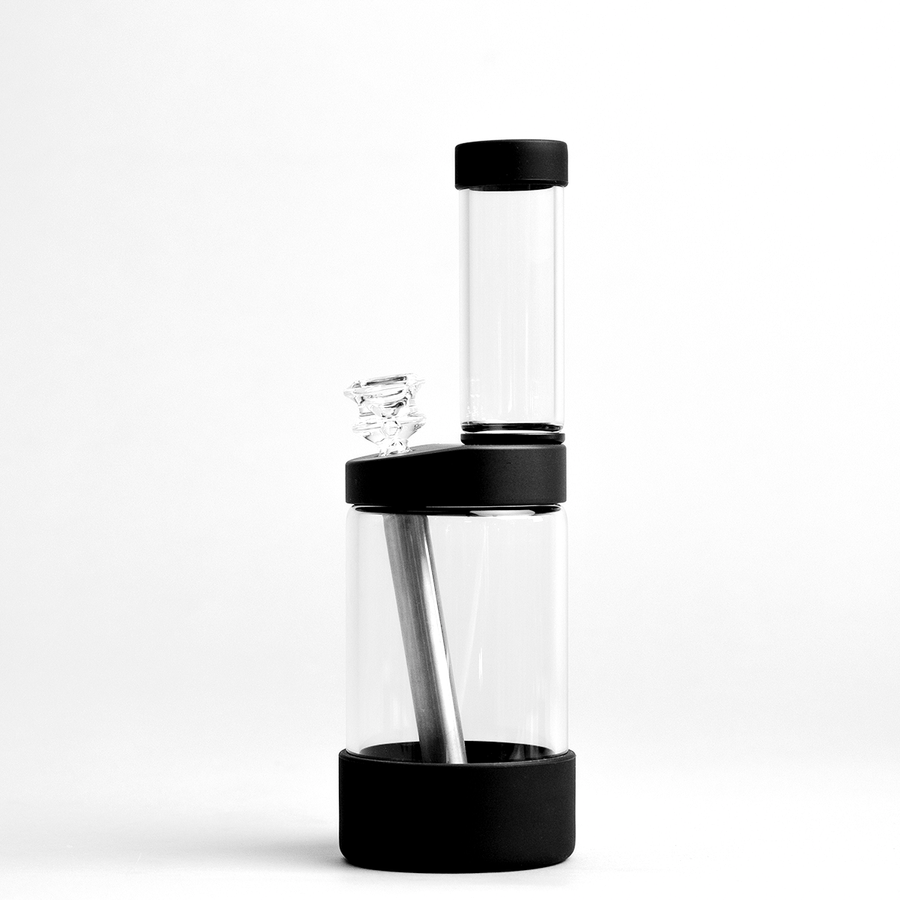
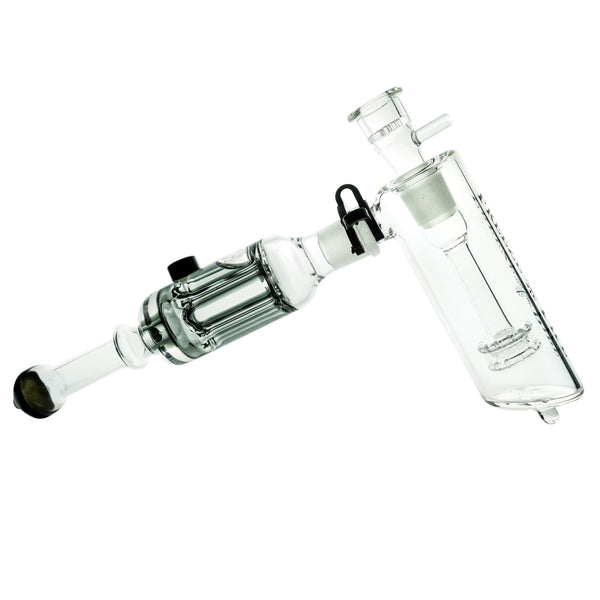
A bubbler combines the compact design of a smoking pipe with water filtration, similar to what you find in a bong. Its anatomy features a bowl where you pack your cannabis or marijuana, leading down into a small chamber filled with water.
This setup cools and filters the smoke as you inhale, offering a smoother hit than dry pipes. The stem or mouthpiece is where you draw in the smoke after it bubbles through the water.
Most bubblers also have what's called a carb hole. You cover this hole while drawing in smoke and release it when ready to inhale. This feature allows for fresh air to enter and push the smoke out quickly, enhancing your smoking experience by cooling down the smoke even further.
Crafting your own homemade bubbler gives not just an artistic outlet but ensures every puff is cooled to perfection.
Benefits of using a bubbler pipe
Using a bubbler pipe offers several advantages, making it an appealing choice for smokers. Here are the benefits you can enjoy:
- Personalized experience: Tailoring your bubbler pipe allows you to create a smoking device that suits your preferences.
- Cost efficiency: Crafting your own water pipe can be an economical alternative to purchasing one.
- Ecological impact: By reusing materials and reducing waste, homemade bubblers can contribute to environmental sustainability.
- Innovation and advancement: Crafting a DIY bubbler provides an opportunity for creativity and skill development in pipe-making.
Personalized experience
Create a unique bubbler that reflects your style and personality. Customize the design using different materials and colors for a personalized touch. Express your creativity by adding patterns or decorations to make it one-of-a-kind.
Your homemade water pipe will be a reflection of your individuality, allowing you to enjoy smoking in a way that resonates with your preferences and tastes.
Now let's explore the cost efficiency of making your own DIY bubbler.
Cost efficiency
Crafting your own bubbler pipe can be a cost-effective choice. By making your DIY water pipe, you could save a significant amount of money compared to purchasing one from a store. This approach not only gives you the satisfaction of creating something unique but also helps in keeping extra dollars in your pocket for other essentials or projects.
Additionally, with materials like glass bottles and basic tools, the cost efficiency of making your homemade water pipe becomes even more appealing.
The affordability of crafting your own smoking device is further highlighted when considering the potential long-term savings. Instead of repeatedly buying commercial water pipes, investing in the creation of a durable and personalized DIY version can lead to substantial savings over time.
So why wait? Start creating your very own homemade bubbler pipe today with our guide, saving money while enjoying a customized smoking experience tailored uniquely to you!
Ecological impact
Making your own bubbler pipe at home can significantly reduce plastic waste and help protect the environment. By reusing materials like glass bottles, you can minimize the production of new plastic smoking devices, contributing to a more sustainable lifestyle.
Embracing DIY projects not only saves money but also helps in reducing your carbon footprint, making a positive impact on the planet. Crafting a homemade water pipe is an eco-friendly alternative that can be both rewarding and environmentally responsible.
Next up, let's explore the essential materials and tools needed for crafting your DIY bubbler.
Innovation and advancement
Innovation and advancement in homemade water pipes have led to improved designs. The use of alternative materials like glass bottles instead of traditional piping allows for more creativity and personalization.
This innovation has also brought about the creation of environmentally friendly options, reducing the ecological impact associated with smoking devices. Additionally, advancements in DIY crafting techniques enable smokers to customize their water pipes according to their preferences while ensuring cost efficiency.
Homemade water pipe innovation has led to enhanced designs, using materials like glass bottles for increased personalization and reduced environmental impact. Advancements in crafting techniques allow for cost-efficient customization.
Materials and Tools Needed for DIY Bubbler
Gather the necessary materials and tools to craft your DIY bubbler at home. Get ready with all essential items for an enjoyable crafting experience.
Essential materials
To craft your own DIY bubbler pipe, you will need a few essential materials such as a glass bottle or jar, a downstem (preferably metal or glass), a bowl piece, rubber grommet, and some clear silicone adhesive.
These items will form the base of your homemade water pipe. Additionally, ensure you have access to rubbing alcohol and coarse salt for cleaning purposes. When choosing the glass bottle or jar for your bubbler, opt for one with thick walls to ensure durability.
Gathering these basic yet crucial materials is the first step towards creating your very own personalized water pipe at home. It's crucial to start with high-quality and safe materials like borosilicate glass for the best results in crafting your DIY smoking device.
Basic tools
To craft your DIY bubbler, you will need a few basic tools. These include a glass cutter or drill, sandpaper for smoothing edges, and silicone sealant for securing the parts together.
A marker for marking the spots to be drilled and safety goggles are also essential to ensure precision and safety during the crafting process.
Ensure you have these key materials too: an empty plastic bottle, a downstem with a bowl piece, and rubber grommets if needed. With these simple tools at hand, you're ready to start creating your own personalized water pipe right from home!
Tips for gathering supplies
Before embarking on your DIY bubbler project, ensure you have all the essential materials and tools ready. The basic supplies required include a glass bottle, rubber grommet, downstem, bowl piece, and silicone sealant.
You can easily find these items at your local hardware store or order them online if needed. Additionally, make sure to gather basic tools such as a drill with glass bit, pliers, and safety goggles for protection during the crafting process.
Once you have sourced all the necessary equipment and materials for your homemade bubbler pipe project, it's time to move on to preparing the glass bottle for assembly.
Step-by-Step Guide to Making a DIY Bubbler
Craft your own DIY bubbler pipe in easy steps and enjoy a personalized water filtration device. Read more to learn how.
Preparing the glass bottle
To prepare the glass bottle for your DIY bubbler, ensure it is clean and dry. Then, mark the spot where you want to create an opening using a marker or tape.
- Use a glass drill bit to carefully drill a hole in the marked spot on the glass bottle.
- As you drill, keep the bottle under running water to prevent overheating and cracking.
- Once the hole is drilled, use sandpaper to smooth any rough edges around the opening.
- Rinse the bottle thoroughly to remove any remaining glass dust.
After preparing the glass bottle, you can move on to assembling your DIY bubbler following the next steps in our guide.
Assembling the bubbler
To assemble your bubbler pipe, follow these steps:
- Attach the downstem: Place the downstem into the hole you've made in the bottle and ensure it fits snugly.
- Add the bowl: Connect the bowl to the other end of the downstem securely.
- Seal any gaps: Use waterproof putty or silicone to seal any gaps between the downstem and the bottle for airtightness.
- Test for leaks: Pour some water into your bubbler and check for any leaks while covering the carb hole.
- Clean and dry: Once confirmed leak-free, thoroughly clean and dry your homemade bubbler before using it.
Enjoy your personalized water pipe creation that's both cost-effective and eco-friendly!
Testing and adjusting
To ensure the functionality of your DIY bubbler, testing and adjusting are crucial steps. Here's a detailed guide to help you through the process:
- Fill the bubbler with water until it covers the downstem but doesn't flow into the mouthpiece.
- Inhale through the mouthpiece to check for resistance and airflow, making adjustments as needed.
- Test for water splash by gently drawing in air while observing any splashes inside the chamber.
- If there are splashes, pour out some water and retest until no splashing occurs.
- Check for leaks by covering all openings with your hands and inhaling to see if air escapes from anywhere.
- Once testing is successful, ensure that all connections are secure before using your homemade bubbler.
Crafting a personalized water pipe can be an enjoyable experience for smokers while also being cost-effective and innovative.
Tips for Creating the Perfect DIY Bubbler
Choose high-quality materials for durability and safety.
Personalize the design to reflect your unique style and preferences.
Choosing the right materials
To create a durable DIY bubbler, opt for heat-resistant glass bottles. Ensure to use safe and non-toxic adhesives like food-grade silicone. Also, consider stainless steel or titanium for the bowl piece to withstand high temperatures and maintain safety for a better smoking experience.
When choosing materials for your homemade water pipe, prioritize durability and safety over aesthetics. Using glass bottles such as Borosilicate not only ensures longevity but also provides a clean taste with no impact on flavor during smoking sessions while ensuring maximum heat resistance and resilience.
Selecting non-toxic adhesives like food-grade silicone is essential in maintaining health standards.
Drilling with precision
When creating your homemade bubbler, ensure precise drilling to avoid cracking the glass. Utilize a diamond drill bit with constant water lubrication for accurate holes. Remember to mark the spots carefully before drilling.
This will prevent any mishaps and ensure a flawless finish on your DIY project. Moving on to "Maintaining Your Bubbler"....
Maintaining your bubbler
After using your bubbler, make sure to clean it regularly with a solution of warm water and isopropyl alcohol. Gently scrub the interior with a pipe cleaner or cotton swab to remove any residue.
To avoid clogs, empty and rinse the bubbler after each use. Store it in a safe place where it won't tip over, and handle it carefully to prevent damage.
Regular cleaning prevents buildup which can affect the taste of your smoke and ensures that your homemade bubbler continues to provide an enjoyable smoking experience.
Using your homemade bubbler
Now that you have your homemade bubbler ready, it's time to use it. Fill the bubbler with water until the stem is immersed about 1 inch deep. Grind your herbs and pack them into the bowl piece on top of the bubbler.
Ensure a tight seal but without clogging. Ignite your herb and inhale gently while lighting - feel the smoke filtering through the water for a smoother draw. The bubbling action cools down and filters out harsh elements for an enhanced smoking experience.
Remember, cleaning your bubbler regularly ensures a fresh taste every time you use it, as resin buildup can affect the flavor and smoothness of hits over time. Regular maintenance goes a long way in preserving both functionality and flavor.
Get creative: personalizing your bubbler design
Transitioning from using your homemade bubbler to personalizing your design, it's time to get creative with your DIY project. When personalizing your bubbler design, you can add unique touches that reflect your style and personality.
Incorporate colorful glass beads or marbles onto the exterior of the bottle for a custom look. Experiment with different shapes and sizes to create a truly one-of-a-kind piece. Consider adding decorative accents like beads, shells, or small trinkets to make your bubbler stand out.
To elevate the aesthetics of your homemade creation, consider incorporating elements such as swirls or stripes made from colored glass rods during the crafting process to achieve a visually appealing finish.
Additionally, explore different techniques such as fusing multiple colors together as part of the glassblowing process for an artistic touch. By customizing every aspect of the design – from color schemes to patterns – you can ensure that your bubbler pipe is not only functional but also an expression of individuality and creativity.
Conclusion
Crafting your own water pipe through a DIY bubbler guide brings innovation and personal touch to smoking experiences. To get the expert view, we turn to Jordan Steele, a seasoned glass artist with over 20 years in crafting smoking apparatuses.
Steele's portfolio boasts an impressive array of custom-designed bubblers and pipes, reflecting his deep understanding of glass artistry and functionality.
Jordan evaluates our DIY guide on building a bubbler pipe as not only innovative but also practical for those looking to enhance their smoking experience. He points out that the detailed steps ensure effectiveness in creating a functional piece without compromising aesthetics.
On safety and ethics, Steele emphasizes the importance of using safe materials and proper techniques. He insists on transparency about the types of glass used, especially concerning heat resistance and durability.
This consideration ensures users can enjoy their homemade devices safely.
Steele suggests incorporating these handcrafted pieces into daily life as both functional tools and conversation starters due to their personalized design elements. He advises aspiring creators to pay close attention to detail during construction for both safety reasons and maintaining the device's longevity.
Comparing DIY options with market alternatives, he notes that while commercial pipes may often come with assured quality standards, creating your own allows for full customization at a potentially lower cost – making it an appealing choice for many.
Ultimately, Jordan believes crafting your own bubbler offers great value by combining personal expression with function. His stamp of approval speaks volumes about the fulfilling journey of creating something unique from scratch without skimping on quality or performance.
FAQs
1. What is a DIY guide for crafting your own water pipe?
A DIY guide for crafting your own water pipe provides step-by-step instructions on how to make a homemade water pipe, also known as a bubbler pipe.
2. Can I make my own smoking device at home?
Yes, you can create your own smoking device at home using the tutorial provided in the DIY water pipe guide.
3. How do I craft a homemade bubbler pipe?
You can craft a homemade bubbler pipe by following the instructions detailed in our homemade water pipe tutorial and using materials like glass pipes commonly found around the house.
4. Are there any tutorials available for making my own smoking apparatus?
Yes, there are many online resources and guides that provide easy-to-follow instructions on how to make your very own homemade smoking apparatus or bubbler pipe.




![Pipe by Vessel [Gunmetal] - Headshop.com](http://www.headshop.com/cdn/shop/files/Pipe_Gunmetal_Angle.jpg?v=1744306453&width=900)
![Pipe by Vessel [Gunmetal] - Headshop.com](http://www.headshop.com/cdn/shop/files/Pipe_Gunmetal_Closed.jpg?v=1744306456&width=1000)




![Pipe by Vessel [Gunmetal] Pipe by Vessel [Gunmetal]](http://www.headshop.com/cdn/shop/files/Pipe_Gunmetal_Angle.jpg?v=1744306453&width=600)


![Vessel Compass Rise [Obsidian] - Headshop.com](http://www.headshop.com/cdn/shop/files/631009c0-e68c-4238-9a63-73f14dd1117f.jpg?v=1717545548&width=900)
![Vessel Compass Rise [Obsidian] - Headshop.com](http://www.headshop.com/cdn/shop/files/a12c8ff4-4bee-4dc9-b697-542f6130e46e.jpg?v=1717609092&width=1000)
![Expedition - Trail Edition [Black] - Headshop.com](http://www.headshop.com/cdn/shop/products/d7c2ec3d-2d0b-48e8-88f1-6a903a43a807.jpg?v=1679517247&width=900)
